28 July 2014, updated 20 Mar 2018 by Remco Bouckaert
Before starting an MCMC run, BEAST uses State Node initialisers to set up the starting trees (and other parameters). Often a good starting tree is already available from another analysis (e.g. a maximum likelihood tree). Though it is against the spirit of MCMC, which guarantees any random starting state will lead to convergence, a good starting tree can help with large analysis to speed up convergence quite a bit. Of course another reason to specify a starting tree is if you want to do an analysis using just a single known tree topology.
We start with standard analysis, but see below for *BEAST and StarBeast2 analyses.
Standard analysis
For a standard analysis, there are a number of ways to specify a starting tree
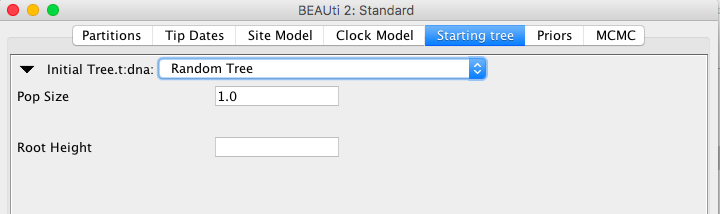
- a random tree based on the coalescent
- a tree in Newick format
- a cluster tree, e.g. through UPGMA or neighbour joining
- a simple random tree
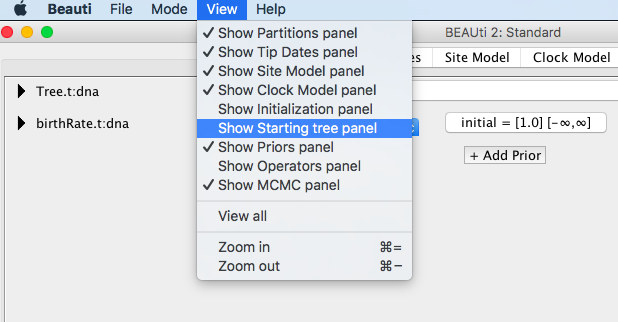
View/Starting tree panel.
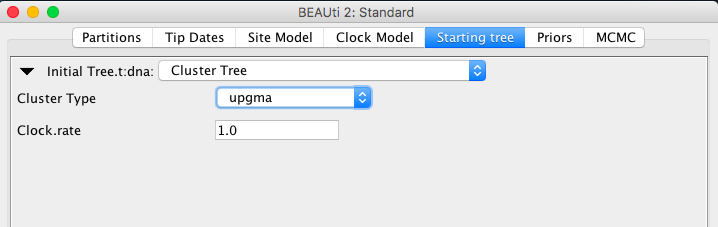
ClusterTree attempts to take monophyletic constraints in account.
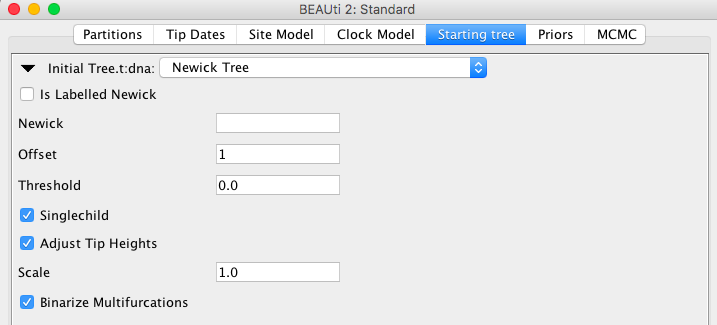
Nnewick entry. Note that if you only have the topology and have timing constraints (i.e., MRCA priors) branch lengths are set to 0.001. Furthermore, if the Adjust Tip Heights flag is set, then tip heights will be set to the height specified in the tip-dating panel (or at zero, if nothing is specified), adjusting branch lengths in the process.
You can scale the tree with a fixed factor using the scale entry.
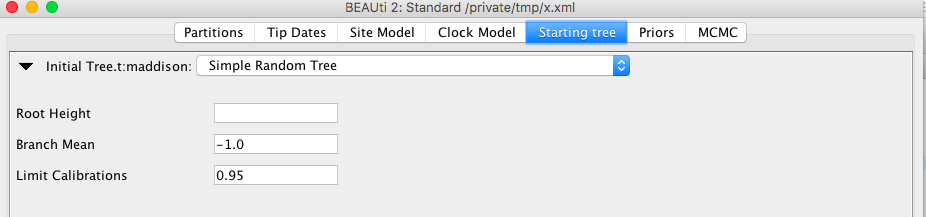
The RandomTree will not always be able to deal with all combinations of calibrations. The SimpleRandomTree available in the BEASTLabs package is more robust. However, it is not based on the coalescent. For BEAST 2.5, a template will be available so you can choose this in BEAUti. For v2.4, it is possible to set edit the XML (see below).
Editing the XML for a Standard Analysis
By default, BEAUti uses a RandomTree state-node initialiser to generate a starting tree. If you want to replace it with a Newick tree or cluster tree, first you need to remove (or comment out) the RandomTree element from the XML. For a tree in partition XYZ26, just search for RandomTree and remove the XML fragment with id RandomTree.t:XYZ26. It should look something like this:
<init estimate="false" id="RandomTree.t:XYZ26" initial="@Tree.t:XYZ26" spec="beast.evolution.tree.RandomTree" taxa="@XYZ26">
    <populationModel id="ConstantPopulation0.t:XYZ26" spec="ConstantPopulation">
        <parameter id="randomPopSize.t:XYZ26" name="popSize">1.0</parameter>
    </populationModel>
</init>
Before removing, make note of the initial attribute (@Tree.t:XYZ26> here) and taxa attribute (@XYZ26 here).
Newick starting tree
After removing the Random tree, in the same place, add a TreeParser using the following fragment
<init spec='beast.util.TreeParser' id='NewickTree.t:XYZ26'
  initial="@Tree.t:XYZ26" taxa='@XYZ26' IsLabelledNewick="true"
  newick="((your,(tree,goes)),here)"/>
The attributes that you want to specify are
- id="NewickTree.t:XYZ26" the ID should be unique, so something like NewickTree.t: plus the name of the tree would be suitable.
- initial="@Tree.t:XYZ26" this refers to the tree being initialised. It should be the same as the initial attribute of the RandomTree that was removed.
- taxa="@XYZ26" this refers to the alignment and ensures that taxa in the tree are lined with those in the alignment. For BEAST v2.1.x, this must be specified to prevent starting with a mislabelled tree
- newick="((your,(tree,goes)),here)" obviously needs to be replaced with your own tree in Newick format.
This is all you need to know to set up a starting tree. There are a few optional attributes you can use to make life a bit easier:
- adjustTipHeights is true by default, which means tips of the tree will be set to zero, or if tip dates are specified to these particular tip dates. By setting to adjustTipHeights="false", tips will be initialised by the heights in the Newick tree.
- if adjustTipHeights="false" then threshold specifies threshold under which node heights (derived from lengths) are set to zero. This helps when there are numeric issues with adding the lengths.
- scale scale used to multiply internal node heights during parsing. Useful for importing starting from external programs, for instance, RaxML tree rooted using Path-o-gen.
- IsLabelledNewick="true" Is the Newick tree labelled (alternatively contains node numbers)?
- If sLabelledNewick="false" then “offset="1" is the lowest taxa number. The default=1 but 0 is common as well. Taxa numbers are as they are ordered in the alignment referred to with the taxa attribute.
Cluster tree
After removing the Random tree, in the same place, add a ClusterTree with the following fragment
<init spec='beast.util.ClusterTree' id='UPGMATree.t:XYZ26'
  initial="@Tree.t:XYZ26" clusterType='upgma'
  taxa='@XYZ26'/>
The attributes that you need to specify are id='UPGMATree.t:XYZ26', initial="@Tree.t:XYZ26" and taxa="@XYZ26", which are as for Newick tree (see above).
You can use different clustering algorithms by specifying the clusterType="upgma" attribute.
| clusterType | Description |
|---|---|
| single | single link |
| complete | complete link |
| upgma or average | UPGMA=average link |
| mean | mean link |
| centroid | centroid |
| ward | Ward’s method |
| adjcomplete | adjusted complete link |
| neighborjoining | neighborjoining |
| neighborjoining2 | neighborjoining2 – corrects tree for tip data, unlike plain neighborjoining |
Simple Random Tree
For using aSimpleRandomTree you need to install the BEASTLabs package. Instead of removing the Random tree, only remove the population model and in the spec-attribute, replace RandomTree with SimpleRandomTree:
<init estimate="false" id="RandomTree.t:XYZ26" initial="@Tree.t:XYZ26" spec="beast.evolution.tree.SimpleRandomTree" taxa="@XYZ26">
    <!-- comment out (or delete) population model
    <populationModel id="ConstantPopulation0.t:XYZ26" spec="ConstantPopulation">
        <parameter id="randomPopSize.t:XYZ26" name="popSize">1.0</parameter>
    </populationModel>
    -->
</init>
*BEAST analysis
For a *BEAST analysis, the default in BEAUti is to generate a UPGMA tree for the species tree, then generate UPGMA trees for each of the gene trees and fit them inside the species tree. In previous incarnations of BEAST, a random tree was generated for species as well as for gene trees, but gene tree branches ending in leaves were lengthened such that each first coalescence of a gene tree was above the root of the species tree. Though this ensures that the gene trees fit inside the species tree, it leads to long burn-in times.
If you want to use a different starting tree for the species tree, first move (not remove!) the StarBeastStartState element generated by BEAUti to just before the run-element with id="mcmc". BEAUti will have generated some elements inside the start-state (such as the species-tree-prior) that we need elsewhere in the analysis. By moving the init element outside the run element, it will not activate the StarBeastStartState.
The StarBeastStartState looks something like this:
<init birthRate="@birthRate.t:Species" estimate="false" id="SBI" popMean="@popMean" spec="beast.evolution.speciation.StarBeastStartState" speciesTree="@Tree.t:Species">
    <tree idref="Tree.t:29" name="gene"/>
    <tree idref="Tree.t:26" name="gene"/>
    <speciesTreePrior bottomPopSize="@popSize" gammaParameter="@popMean" id="SpeciesTreePopSize.Species" spec="beast.evolution.speciation.SpeciesTreePrior" taxonset="@taxonsuperset" tree="@Tree.t:Species"/>
</init>
For every gene tree there will be a tree entry in the StarBeastStartState. To replace the species tree with a Newick tree, add the following fragment (at the place where the StarBeastStartState was):
<init spec='beast.util.TreeParser' id='NewickTree.t:Species'
   initial="@Tree.t:Species" taxonset='@taxonsuperset'
   IsLabelledNewick="true"
   newick="((your,(tree,goes)),here)"/>
The only thing to set up is the Newick using the newick attribute — all other attributes should be as they are (it is using the species tree, which is identified by the Species partition in every *BEAST analysis generated by BEAUti).
For each of the gene trees, you need to specify a tree as well. You can specify them using a Newick tree as for the Standard analysis (see above). Alternatively, you can use a random tree that is placed ‘above’ the species tree. To do this, you add for the first gene tree (just below the new Species tree start tree):
<init spec='beast.evolution.speciation.RandomGeneTree'
      id='randomGeneTree1' initial='@Tree.t:26'
      speciesTree='@Tree.t:Species' taxa='@26'>
  <populationModel id='popmodel' spec='ConstantPopulation' popSize="1.0"/>
</init>
where you replace the initial='@Tree.t:26' and taxa="@26" attributes to match your tree (instead of 26, as in this example). For every subsequent gene tree, you add (below the first gene start tree):
<init spec='beast.evolution.speciation.RandomGeneTree'
  id='randomGeneTree2' initial='@Tree.t:29'
  speciesTree='@Tree.t:Species' taxa='@29'
  populationModel='@popmodel'/>
where you replace the initial='@Tree.t:29' and taxa="@29" attributes to match your tree (instead of 29) and make sure the id is unique.
StarBEAST2 analysis
StarBEAST2 analysis require theStarBEAST2 package.
Setting up starting trees is very similar to setting them up for a *BEAST analysis, but
these analyses use a custom species tree, and a custom StarBeastInitialiser with id="SBI". To change the starting trees, you should remove the element with id="SBI", and follow instructions for *BEAST starting trees above.